
It can be useful to be able to look back over a given period and review the scans performed in ezFMD. This is a guide on how to view or download the history of scans performed.
ezFMD offers three “levels” of history:
- For each user who logs onto a PC with their own account, there is an on-screen history of the last 100+ scans performed under that log-in visible in the History tab, unless they clear the history with the Clear button.
-
In order to see all scans performed on the current PC, the user should select Download (See (2) below) and download the data within the specified dates to Excel. This list is not impacted by the Clear button and scans performed under all logins on the current PC will be downloaded.
- Finally, where a user is logged in as an Admin in ezFMD, they can download all scans performed at the current location (e.g. all scans performed on all PCs in Hospital X).
To Download your history:
On the main screen, select the tab marked History (see (1)) and within that, click on the button marked Download (See (2)):

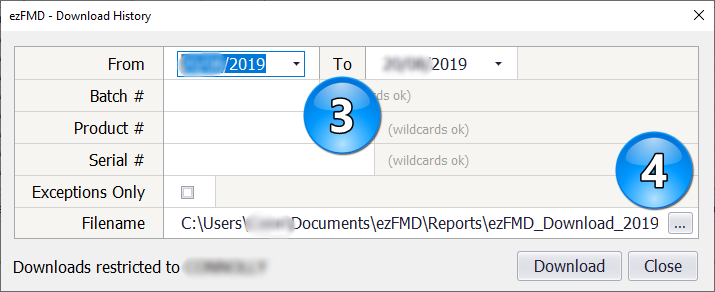
This will open a screen, where you can enter the date range you require (see (3)) and (optionally) change the location where the resulting file will be saved (see (4)):
The data downloaded will be restricted as follows:
- For Admins, all scans performed by the entire organisation will be retrieved
- For non-Admin users, scans performed at the current PC will be retrieved.
When the download is completed, the data for the selected date range will be displayed in Excel:

Naturally, the downloaded data can be filtered, sorted, archived or otherwise used in any manner that suits your purpose.
The fields included in the Excel file are:
Time
Product Code
Product Name
Pack Size
Strength
Serial
Batch
Expiry
Action
Result
Pack Status
OpCode
Alert
Warning
Information
User
Station
Location